The chaps at the Bamboo Bicycle Club in London are demonstrating the power of 3D Printing and bamboo during a Future Bike Live challenge at the Design Museum. Check it out at Kickstarter:
Category: Frame building
Calfee Bamboo Bike Kit on Kickstarter
How cool is this? There’s some great simple innovations in the frame building kit here. I hope it gets funded!
Ghana Bamboo Bikes Initiative
Some great bikes being made in Ghana! Quite wonderful to see how the world is adapting to renewable resources and social enterprises. Good stuff.
Ghana's Eco-Friendly Bamboo Bikes
Meet the Ghanaian entrepreneur who's building bikes out of bamboo.
Posted by AJ+ on Tuesday, 19 January 2016
An all carbon bike?
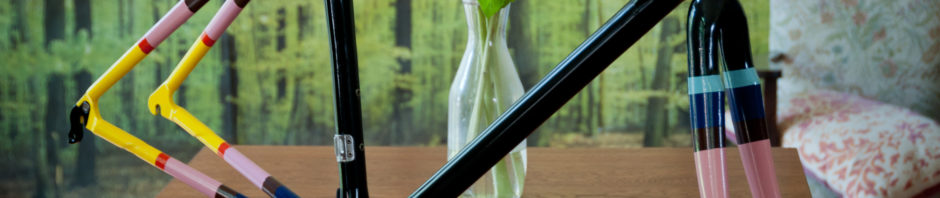
A while back my awesome LBS gave me a box of carbon tubes and lugs and said “You’re the right person to give these too!”. And with that I had 4 frames to build, one of which I’ve completed. Take a squizz:


The process wasn’t a simple one. Here’s what I did:
- Bonded all carbon tubes and dropouts together
- Sanded and filed those back.
- Drilled and riveted front derailleur clamp
- Drilled and set water bottle bosses
- Drilled custom internal cable routing
- 3D printed custom rear brake boss
- 3D printed cable stop for front derailleur cable
- Masked and handpainted the colour stripes with enamel paint
- Flat black enamel spray followed by 3 coats of gloss enamel spray.
What does this mean for bamboo? Well, I don’t know at this stage. It’s certainly easier working with full carbon, pre-made tubes! Maybe there’ll be another bamboo bike made soon… only time will tell.
The Samurai has passed the frame test!
Today my 4th frame, the recently finished The Samurai, underwent my quality assurance testing that I do on all frames. The video below details the test and shows that the frame is strong and passes the Australian Standards for Frame and Fork Assembly. Stay tuned for a time-lapse of the parts build!
It’s not always plain sailing
The Samurai, my fourth frame was going well until I discovered that the seat-tube had developed some cracks around both the bottom bracket and where the seat-post sleeve inserts into it.
Luckily I hadn’t yet carbon fibered up either of those joints so I’ve been able to cut out the offending tube and will replace it with one that’s hopefully not so prone to cracking.
The cause of the cracking is probably due to the consistent cold temperates in the workshop overnight and that without coatings of epoxy bamboo will naturally dry out and become brittle and crack. It’s also due to the steel seat-post sleeve insert changing temperatures at different rates to the bamboo, causing the bamboo to crack.
Interestingly both the cracks were in places that would have been covered with carbon fiber and they probably won’t have propagated any further, but I couldn’t take the risk of that not being the case and don’t want to let a mistake roll out the door.
Below are some pics of the cracked seat-tube both before and after I’ve cut it out. It was interesting to see the different levels of adhesion (or lack thereof) of the epoxy to the various materials. It’s mostly only mechanically bonded to both the steel and the bamboo, making it very important to roughen up the surfaces to ensure a good bond. The aluminium bottom bracket is painted in a specific etch primer (the white paint), but it doesn’t seem to have chemically adhered properly to it. I’ll have to investigate why!


Panda progress
Bamboo Bike #3, dubbed The Panda by its eventual owner is nearing completion. I’ve laid up 95% of the carbon fibre and just need to do some final cosmetic layers and then lots of finishing. Then comes the tricky things like brake holes, derailleur mounts and cable stops. Then some clear coat, then some testing!
Bamboo Bike #4 isn’t far away either. The head-tube’s been wrapped and the rest is scheduled to be done next week.
Here’s a few progress pics of The Panda:

all layed up, just needs sanding back

still a few more layers to go, then lots of sanding

they’ll be polished up to a mirror finish

kinda went overboard on the filleting, but it should be super stiff

needs one more cosmetic layer and a bit more sanding

all done

looking pretty messy at this point with all the tape, but rest assured there’s beautifully scratch free bamboo under there!
DIY Bamboo Bike Workshops
We’re investigating setting up a space to run bamboo bike building workshops in Melbourne this winter (the best time to build!). If you’ve got a spare 5 minutes we’d love you to respond to a questionnaire on how we should run these workshops.
Start the Bamboo bike building workshop questionnaire
The progressing Panda
I’ve been hard at work on the 3rd frame and it’s almost ready for tack gluing in the jig. The 4th frame is very similar to the Panda so I’m going to make them in parallel, which should hopefully cut down some of the labour time. Here’s some pics.
")


I’ve also had Daisy back in the shop and am in the process of sanding back the finish and redoing her with a UV protective varnish instead of epoxy resin. This should protect the frame for a lot longer and prevent fading and cracking.
Foam & carbon
I’m using expanding filler foam on this frame as lightweight way to make the joints more curvaceous (and thus stronger). It’s super easy to sand back and shape and doesn’t take long to set.
I’ve done the initial wrappings of the rear end and head-tube with 12K carbon fiber tow. So far it’s taken 90metres of the stuff! I’ll cover these in 1-3 layers of woven carbon fiber cloth then 2 layers of clear coat. Job done.


Ready for carbon
Got the two bridges glued in today and it’s all sanded back smooth ready for the carbon layup.


All tacked up.
Got the new jig all set and the 2nd frame all tacked up last night. Next is to do the brake and chain stay bridges, then onto a layer of fibreglass (only around the metal parts) then carbon fibre!


Precision engineering
There’s something very sexy about lasers. Besides being commonly attached to sharks they’re also very sexy in that they can cut through 6mm stainless steel like it’s butter. That’s right folks – the drop-outs I designed have been laser cut by the good folk at New Touch Laser and delivered to my door. I’ve got 10 sets cut, which means there’s a run of 10 bamboo bikes being built in the very near future!
Here’s some pics of the drop-outs, me tapping the thread for the derailleur screw in and how they’ll integrate into the bamboo chain-stays:


Getting a jiggle on
I decided to splurge out on a better jig, as the home-made setup I was previously using was a bastard to adjust and get everything level and straight. So I ordered some Maytec aluminium extrusion and components and now have something that’s a lot easier to work with! Here’s some pics of the new setup:


Bamboo Bike #2 – The Daisy
The second bike is underway. She’ll be a similar vein to Maisy, but for a friend named Daisy. I’ve got the front triangle mitred and the drop-outs are being laser cut. Progress!
